...
At the moment we support a total of 8 annotations, you can find out what they do and how to use them in this chapter of the Developers Guide.
We'll work with example code in an sample application, follow the first steps in the Getting started in 5 Minutes page, to make sure you have downloaded and installed the extension.
You can use the same JDeveloper project that is used in the Getting started page.
| Table of Contents | ||||
|---|---|---|---|---|
|
ElementCustomization
Every customization is a customization for one element. We need to tell this to the Java class by adding an annotation to the class.
We add the annotation '@ElementCustomization(target = "")' after which JDeveloper should add an import to the 'org.adfemg.datacontrol.xml.annotation.ElementCustomization' class.
The annotation needs an attribute target, here we need to enter the full name to the package of the element we want to customize with this Java class.
The easiest way to get the correct information is to go to the pageDef file and copy the BeanClass from the accessorIterator.
Resulting in the following code:
| Code Block | ||
|---|---|---|
| ||
package org.adfemg.xmlsample.cust;

import org.adfemg.datacontrol.xml.annotation.ElementCustomization;

@ElementCustomization(target = "org.adfemg.xmlsample.HrDeptEmpDC.getDeptEmps.DepartmentEmployeesResponse.Employee")
public class EmployeeCust {
} |
Inside this class we can now start writing methods to customize the Employee element.
CalculatedAttr
A calculated attribute is read only and based on other attributes inside the same element.
Inside the java class create the following method:
| Code Block | ||
|---|---|---|
| ||
@CalculatedAttr
public String getFullName(XMLDCElement employee) {
	return employee.get("firstName") + " " + employee.get("lastName");
} |
...
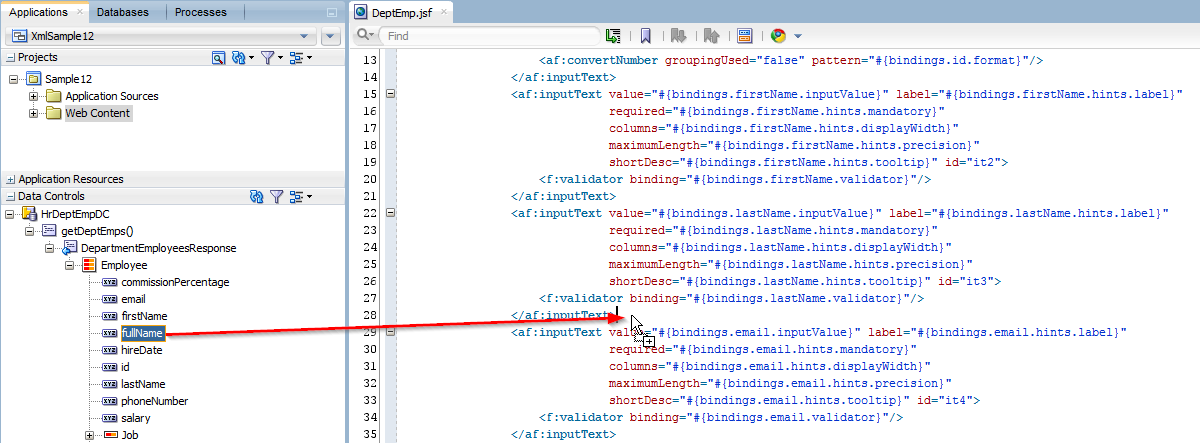
Add an Text -> ADF Input Text w/ Label:

Resulting in the following inputText:
| Code Block | ||
|---|---|---|
| ||
<af:inputText value="#{bindings.fullName.inputValue}" label="#{bindings.fullName.hints.label}"
			  required="#{bindings.fullName.hints.mandatory}"
              columns="#{bindings.fullName.hints.displayWidth}"
              maximumLength="#{bindings.fullName.hints.precision}"
              shortDesc="#{bindings.fullName.hints.tooltip}" id="it8">
      <f:validator binding="#{bindings.fullName.validator}"/>
</af:inputText> |
Now run the page again and check out the fullName attribute in action!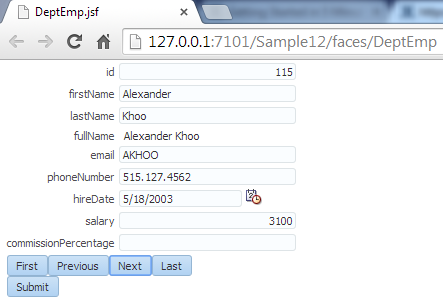
TransientAttr
A transient attribute in the XML DataControl is a lot like the transient attributes in the ADF Business Components layer.
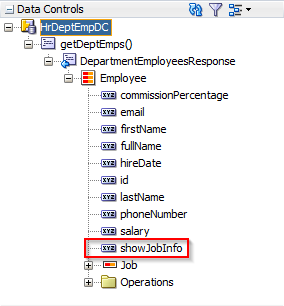
On the page we want the user to be able to toggle between showing jobs information or not. So we will introduce an transient attribute called 'showJobInfo'.
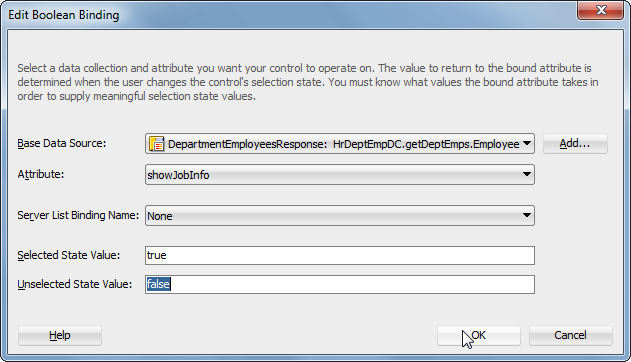
We create this again with a simple annotation on a method in the same EmployeeCust Java class.

...
Now we are ready to continue building on the interface.
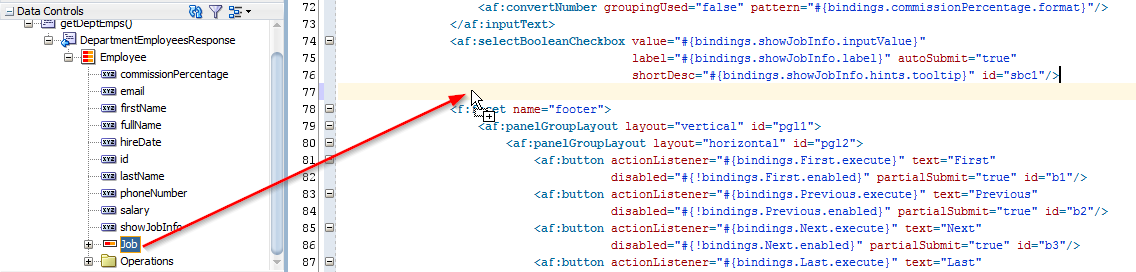
First we add the Element showJobInfo to the bottom of the page: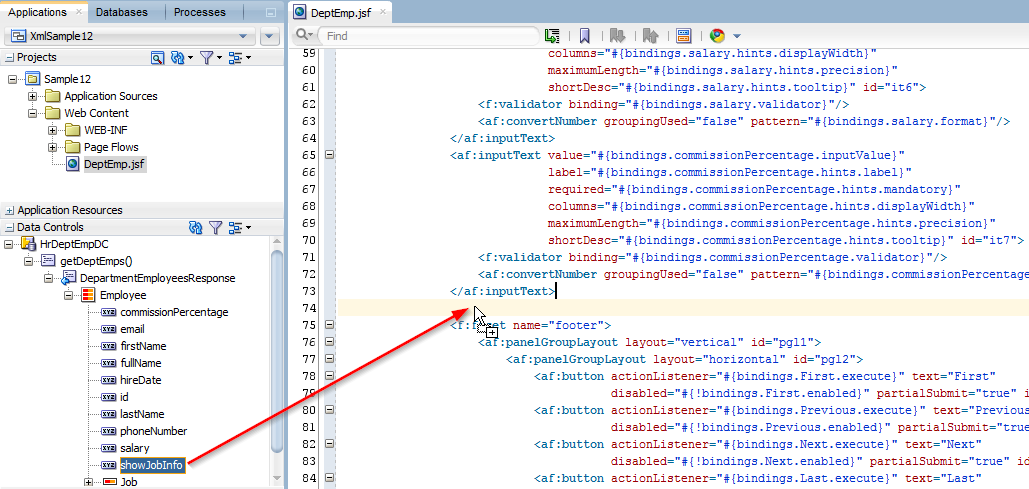
Add this to the page as an ADF Select Boolean Checkbox: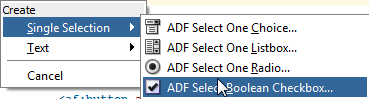
Don't forget to add the property autoSubmit="true" on the selectBooleanCheckbox.
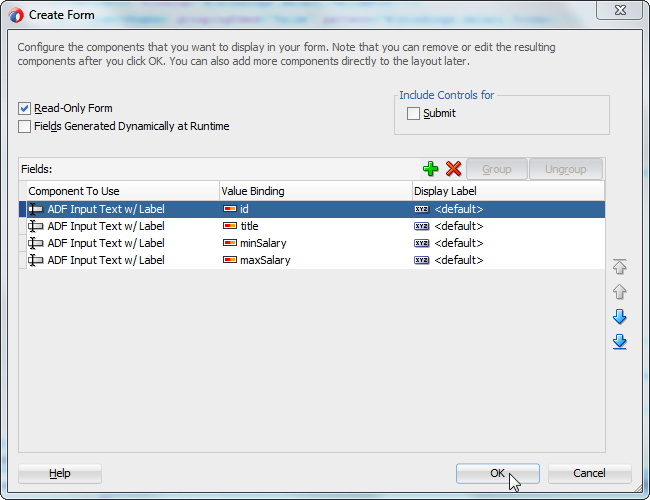
Next we are going to add a read only form with information about the job of the employee:
Now all we need to do is add the rendered expression 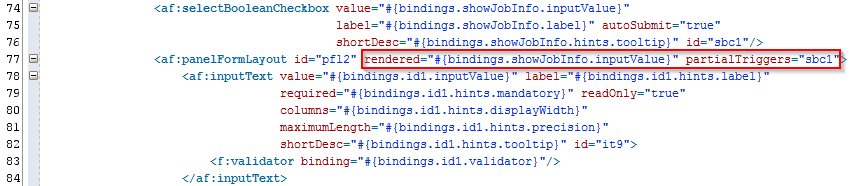
After this run the page to look at the result. 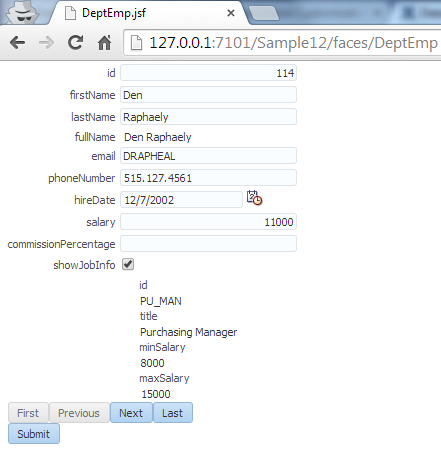
Notice the showJobInfo with the initial value set to true (as we returned in the java method).
The layout of the JobInfo form doesn't look too good, but that's for an other time ![]() .
.
Now lets try to toggle the checkbox and see what happens:
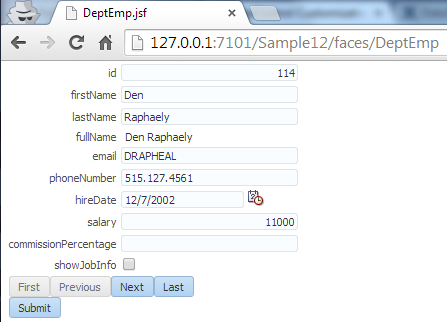
You see the formLayout with the job information disappear.
AttrValidation
Now lets work on an attribute validation. Lets create a rule that the salary of an employee can not be lowered (we would all like that, wouldn't we?).
An attribute validation is a validation specific for one attribute, if you want to have validation over multiple attributes or an element, you need to use the ElementValidation customization.
You will not see this attribute validation in the DataControl, but once the attribute on the page is submitted, the validation will fire.
If the validation fails, it is up to you as programmer to throw the correct error message as an AttrValException.
| Code Block | ||
|---|---|---|
| ||
     @AttrValidation
    public void validateSalary(AttrChangeEvent event) throws AttrValException {
        BigDecimal oldVal = (BigDecimal) event.getOldValue();
        BigDecimal newVal = (BigDecimal) event.getNewValue();
        if (newVal != null && oldVal != null && newVal.compareTo(oldVal) < 0) {
            throw new AttrValException(AttrValException.TYP_ATTRIBUTE, "Salary can not be lowered", "SAL-0001",
                                       event.getElement().getDefinition().getFullName(), event.getAttribute());
        }
} |
...
ElementValidation
Sometimes, just an attribute validation is not enough, you want to do a validation involving two or more attributes in your validation. This is supported by the ElementValidation.
The ElementValidation is invoked at the end of the request during the validate of the DataControl. The ElementValidation throws an ValidationException.
Optional you can provide a list of attributes to limit firing when only specified attributes have changed.
| Code Block | ||
|---|---|---|
| ||
    @ElementValidation(attr = { "salary", "commissionPercentage" })
    public void validateIfAttrChanged(XMLDCElement employee) {
        BigDecimal salary = (BigDecimal) employee.get("salary");
        BigDecimal commissionPercentage = (BigDecimal) employee.get("commissionPercentage");
        if (salary == null && commissionPercentage == null) {
            throw new ValidationException("Salary and commission percentage can not both be empty");
        }
} |
...

PostAttrChange
This annotation will monitor an attribute based on the method signature.
| Code Block | ||
|---|---|---|
| ||
    @PostAttrChange
    public void salaryChanged(AttrChangeEvent event) {
        event.getElement().putInternal("commissionPercentage", null);
} |
The AttrChangeEvent will contain attribute name, old value, new value and XMLDCElement (aka ViewRow).
In this case, we will clear the commissionPercentage field if the salary changes.
| Employee with commissionPercentage | Change the Salary from 2900 to 3100 | commissionPercentage will be cleared |
 | 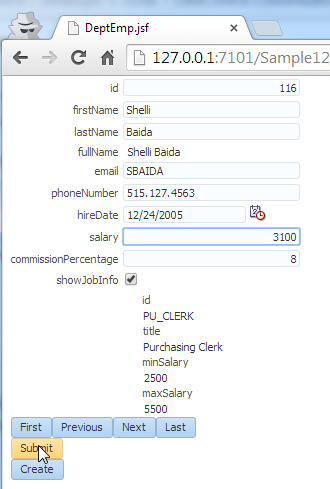 | 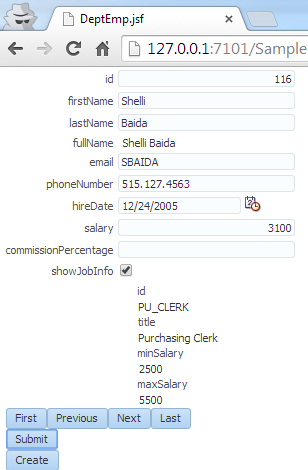 |
Created
In some use cases you want to manipulate an Element the moment it is created (a “new row”). For this you can use the Created annotation. The XML Data Control will call your java method if a new Element is created.
| Code Block | ||
|---|---|---|
| ||
@Created
public void elementCreated(XMLDCElement employee) {
employee.putInternal("hireDate", new Date());
} |
...
Operation
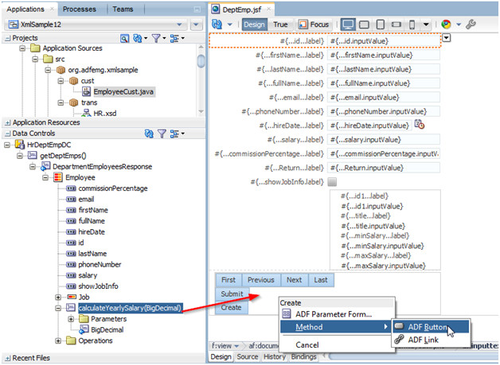
Next to manipulating data, there are also scenario’s in which case we want to write a custom method, for these cases we introduced to @Operation annotation. You can write any java code including input and return parameters and use the @Operation method to generate an operation on the Data Control.
| Code Block | ||
|---|---|---|
| ||
@Operation
public BigDecimal calculateYearlySalary(XMLDCElement employee, BigDecimal salesVolume) {
	BigDecimal retval = null;
	BigDecimal salary = (BigDecimal) employee.get("salary");
	BigDecimal commissionPercentage = (BigDecimal) employee.get("commissionPercentage");
	if (salesVolume == null || salary == null || commissionPercentage == null) {
		return retval;
	}
	retval = salary.add(salesVolume.multiply(commissionPercentage));
	return retval;
} |
...
...
...
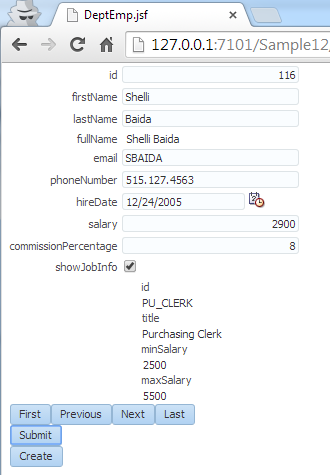
After this run the page, it should look like this:
...